Qubes Windows Tools (QWT) in Qubes OS 4.0
Warning: The content below describes Qubes Windows Tools installation in Qubes R4.0. The text has been updated to reflect the newer R4.1 release and QWT recent development. Please see this updated document for instructions for Qubes R4.1 and the updated version of Qubes Windows Tools.
Qubes Windows Tools are a set of programs and drivers that provide integration of Windows AppVMs with the rest of the Qubes system. Currently the following features are available for Windows VMs after installation of those tools:
- Qubes Video Driver - provides for the Seamless GUI mode that integrates apps windows onto the common Qubes trusted desktop
- File sender/receiver - Support for secure clipboard copy/paste between the Windows VM and other AppVMs
- File sender/receiver - Support for secure file exchange between the Windows VM and other AppVMs
- Copy/Edit in Disposable VM - Support for editing files in DisposableVMs as well as for qvm-run and generic qrexec for the Windows VM (e.g. ability to run custom service within/from the Windows VM)
- Xen PV drivers for Windows that increase performance compared to qemu emulated devices
Below is a breakdown of the feature availability depending on the windows version:
| Feature | Windows 7 x64 | Windows 10 x64 |
|---|---|---|
| Qubes Video Driver | + | - |
| Qubes Network Setup | + | + |
| Private Volume Setup (move profiles) | + | + |
| File sender/receiver | + | + |
| Clipboard Copy/Paste | + | + |
| Application shortcuts | + | + |
| Copy/Edit in Disposable VM | + | + |
| Block device | + | + |
| USB device | + | + |
| Audio | - | - |
Qubes Windows Tools are open source and are distributed under a GPL license.
Notes:
- Qubes Windows Tools are currently unmaintained
- Currently only 64-bit versions of Windows 7 and Windows 10 are supported by Qubes Windows Tools. Only emulated SVGA GPU is supported (although there has been reports on working GPU passthrough).
- This page documents the process of installing Qubes Windows Tools on versions up to R3.2.. Installation on Qubes R4.0 is possible but is a work in progress and there are limitations/bugs (see issue #3585).
Installing Windows OS in a Qubes VM
Please refer to this page for instructions on how to install Windows in a Qubes VM.
Note: It is strongly suggested to enable autologon for any Windows HVMs that will have Qubes Tools installed. To do so, run netplwiz command from the Win+R/Start menu and uncheck the Users must enter a user name and password to use this computer option.
Installing Qubes guest tools in Windows 10 VMs
This will allow you to install the Qubes Windows Tools on Windows 10 both as a StandaloneVM as well as a Template VM and a corresponding AppVM. But some features are not available:
Note: seamless mode is currently not available for windows. Please check the top of this document for the full feature availability breakdown.
-
In the Windows 10 VM, download from the XEN website the installation kits for Xen bus (
xenbus) and storage drivers (xenvbd) Version 9.0.0 (two filesxenvbd.tarandxenbus.tar). -
Use an archive extractor like 7-zip to extract the contents of the
.tarfiles. -
Install
xenvbdandxenbusby starting the filedpinst.exefrom thex64directories of the extracted tar-files. If during installation, the Xen driver requests a reboot, select “No” and let the installation continue. -
After installation, reboot.
-
Download the Qubes Windows Tools (
qubes-tools-4.0.1.3.exe) from the qubes FTP server and move it toC:\. -
Check the integrity of the file
qubes-tools-4.0.1.3.exeby comparing its hash checksum. This can be done using the Windows commandcertutilon the windows command prompt (cmd.exe) and specifying an appropriate hash algorithm like:certutil -hashfile C:\qubes-tools-4.0.1.3.exe SHA256And compare it the value to
148A2A993F0C746B48FA6C5C9A5D1B504E09A7CFBA3FB931A4DCF86FDA4EC9B1(it has to exactly match for security reasons). If it matches, feel free to continue the installation. If not, repeat the download to make sure it was not corrupted due to a network problem. If keeps on not matching it might be an attacker attempting to do something nasty to your system – Ask for support.Note: This is a workaround for installing the qubes windows tools on windows 10 since the standard way is broken.
-
Install Qubes Windows Tools 4.0.1.3 by starting
qubes-tools-4.0.1.3.exe, not selecting theXen PV disk driversand theMove user profiles(which would probably lead to problems in Windows, anyhow). If during installation, the Xen driver requests a reboot, select “No” and let the installation continue - the system will be rebooted later. -
Shut down Windows and wait until the VM is really stopped, i.e. Qubes shows no more activity.
-
On a
dom0terminal write: (where<VMname>is the name of your Windows 10 VM)qvm-features <VMname> gui 1 qvm-prefs <VMname> qrexec_timeout 300 -
Reboot Windows. If the VM starts, but does not show any window then shutdown Windows from the Qube manager, wait until it has really stopped, and reboot Windows once more.
-
Now the system should be up, with QWT running correctly.
-
Lastly to enable file copy operations to a Windows 10 VM the
default_userproperty should be set the<username>that you use to login to the Windows VM. This can be done via the following command on adom0terminal: (where<VMname>is the name of your Windows 10 VM)qvm-prefs <VMname> default_user <username>
Note: If this property is not set or set to a wrong value, files copied to this VM are stored in the folder
C:\Windows\System32\config\systemprofile\Documents\QubesIncoming\<source_VM>
If the target VM is an AppVM, this has the consequence that the files are stored in the corresponding TemplateVM and so are lost on AppVM shutdown.
Installing Qubes guest tools in Windows 7 VMs
First, make sure that qubes-windows-tools is installed in your system:
sudo qubes-dom0-update qubes-windows-tools
(If the above command does not work, it could be that the Qubes Tools are not in the stable repo yet. Try installing from the testing repo instead.)
You can also install the package from testing repositories, where we usually publish new versions first:
sudo qubes-dom0-update --enablerepo=qubes-dom0-current-testing qubes-windows-tools
This package brings the ISO with Qubes Windows Tools that is passed to the VM when --install-windows-tools is specified for the qvm-start command. Please note that none of this software ever runs in Dom0 or any other part of the system except for the Windows AppVM in which it is to be installed.
Before proceeding with the installation we need to disable Windows mechanism that allows only signed drivers to be installed, because currently (beta releases) the drivers we provide as part of the Windows Tools are not digitally signed with a publicly recognizable certificate. To do that:
- Start command prompt as Administrator, i.e. right click on the Command Prompt icon (All Programs -> Accessories) and choose “Run as administrator”
- In the command prompt type
bcdedit /set testsigning on - Reboot your Windows VM
In the future this step will not be necessary anymore, because we will sign our drivers with a publicly verifiable certificate. However, it should be noted that even now, the fact that those drivers are not digitally signed, this doesn’t affect security of the Windows VM in ‘any’ way. This is because the actual installation ISO (the qubes-windows-tools-*.iso file) is distributed as a signed RPM package and its signature is verified by the qubes-dom0-update utility once it’s being installed in Dom0. The only downside of those drivers not being signed is the inconvenience to the user that he or she must disable the signature enforcement policy before installing the tools.
To install the Qubes Windows Tools in a Windows VM one should start the VM passing the additional option --install-windows-tools:
qvm-start lab-win7 --install-windows-tools
Once the Windows VM boots, a CDROM should appear in the ‘My Computer’ menu (typically as D:) with a setup program in its main directory.
After successful installation, the Windows VM must be shut down and started again, possibly a couple of times.
Qubes will automatically detect the tools has been installed in the VM and will set appropriate properties for the VM, such as qrexec_installed, guiagent_installed, and default_user. This can be verified (but is not required) using qvm-prefs command:
qvm-prefs <your-appvm-name>
Note: it is recommended to increase the default value of Windows VM’s qrexec_timeout property from 60 (seconds) to, for example, 300. During one of the first reboots after Windows Tools installation Windows user profiles are moved onto the private VM’s virtual disk (private.img) and this operation can take some time. Moving profiles is performed in an early boot phase when qrexec is not yet running, so timeout may occur with the default value. To change the property use this command in dom0:
qvm-prefs <vm-name> qrexec_timeout 300
Xen PV drivers and Qubes Windows Tools
Installing Xen’s PV drivers in the VM will lower its resources usage when using network and/or I/O intensive applications, but may come at the price of system stability (although Xen’s PV drivers on a Win7 VM are usually very stable). There are two ways of installing the drivers:
- installing the drivers independently, from Xen’s official site
- installing Qubes Windows Tools (QWT), which bundles Xen’s PV drivers.
Notes about using Xen’s VBD (storage) PV driver:
- Windows 7: installing the driver requires a fully updated VM or else you’ll likely get a BSOD and a VM in a difficult to fix state. Updating Windows takes hours and for casual usage there isn’t much of a performance between the disk PV driver and the default one; so there is likely no need to go through the lengthy Windows Update process if your VM doesn’t have access to untrusted networks and if you don’t use I/O intensive apps. If you plan to update your newly installed Windows VM it is recommended that you do so before installing Qubes Windows Tools (QWT). If QWT are installed, you should temporarily re-enable the standard VGA adapter in Windows and disable Qubes’ (see the section above).
- the option to install the storage PV driver is disabled by default in Qubes Windows Tools
- in case you already had QWT installed without the storage PV driver and you then updated the VM, you may then install the driver from Xen’s site (xenvbd.tar).
Caution: Installing the version 9.0.0 Xen drivers on Windows 7 (a system without QWT - QWT uninstalled) leads to an unbootable system. The drivers install without error, but after reboot, the system aborts the reboot saying Missing driver xenbus.sys.
- Windows 10: The version 9.0.0 Xen drivers have to be installed before installing Qubes Windows Tools. Installing them on a system with QWT installed is likely to produce a system which crashes or has the tools in a non-functional state. Even if the tools were installed and then removed before installing the Xen drivers, they probably will not work as expected.
With Qubes Windows Tools installed the early graphical console provided in debugging mode isn’t needed anymore since Qubes’ display driver will be used instead of the default VGA driver:
qvm-prefs -s win7new debug false
Using Windows AppVMs in seamless mode
Note: This feature is only available for Windows 7
Once you start a Windows-based AppVM with Qubes Tools installed, you can easily start individual applications from the VM (note the -a switch used here, which will auto-start the VM if it is not running):
qvm-run -a my-win7-appvm explorer.exe


Also, the inter-VM services work as usual – e.g. to request opening a document or URL in the Windows AppVM from another VM:
[user@work ~]$ qvm-open-in-vm work-win7 roadmap.pptx
[user@work ~]$ qvm-open-in-vm work-win7 https://invisiblethingslab.com
… just like in the case of Linux AppVMs. Of course all those operations are governed by central policy engine running in Dom0 – if the policy doesn’t contain explicit rules for the source and/or target AppVM, the user will be asked whether to allow or deny the operation.
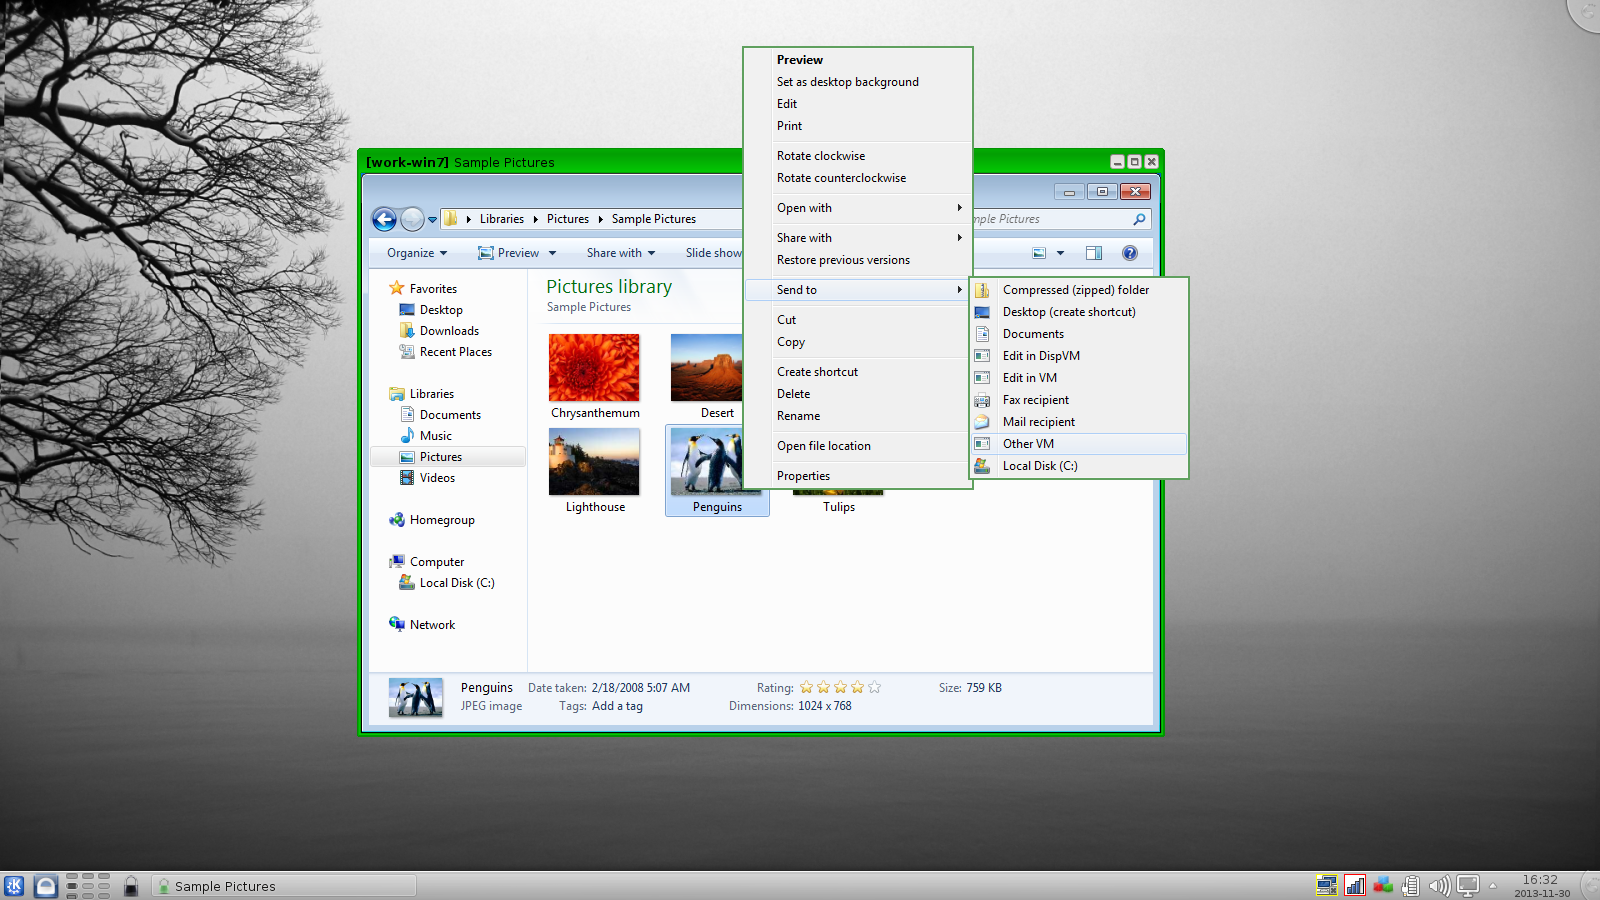
Inter-VM file copy and clipboard works for Windows AppVMs the same way as for Linux AppVM (except that we don’t provide a command line wrapper, qvm-copy-to-vm in Windows VMs) – to copy files from Windows AppVMs just right-click on the file in Explorer, and choose: Send To-> Other AppVM.
To simulate CTRL-ALT-DELETE in the HVM (SAS, Secure Attention Sequence), press Ctrl-Alt-Home while having any window of this VM in the foreground.
Changing between seamless and full desktop mode
You can switch between seamless and “full desktop” mode for Windows HVMs in their settings in Qubes Manager. The latter is the default.
Using template-based Windows AppVMs
Qubes allows HVM VMs to share a common root filesystem from a select Template VM, just as for Linux AppVMs. This mode is not limited to Windows AppVMs, and can be used for any HVM (e.g. FreeBSD running in a HVM).
In order to create a HVM TemplateVM one can use the following command, suitably adapted:
qvm-create --class TemplateVM win-template --property virt_mode=HVM --property kernel='' -l green
… , set memory as appropriate, and install Windows OS (or other OS) into this template the same way as you would install it into a normal HVM – please see instructions on this page.
If you use this Template as it is, then any HVMs that use it will effectively be DisposableVMs - the User directory will be wiped when the HVN is closed down.
If you want to retain the User directory between reboots, then it would make sense to store the C:\Users directory on the 2nd disk which is automatically exposed by Qubes to all HVMs.
This 2nd disk is backed by the private.img file in the AppVMs’ and is not reset upon AppVMs reboot, so the user’s directories and profiles would survive the AppVMs reboot, unlike the “root” filesystem which will be reverted to the “golden image” from the Template VM automatically.
To facilitate such separation of user profiles, Qubes Windows Tools provide an option to automatically move C:\Users directory to the 2nd disk backed by private.img.
It’s a selectable feature of the installer, enabled by default, but working only for Windows 7.
If that feature is selected during installation, completion of the process requires two reboots:
- The private disk is initialized and formatted on the first reboot after tools installation. It can’t be done during the installation because Xen mass storage drivers are not yet active.
- User profiles are moved to the private disk on the next reboot after the private disk is initialized.
Reboot is required because the “mover utility” runs very early in the boot process so OS can’t yet lock any files in there.
This can take some time depending on the profiles’ size and because the GUI agent is not yet active dom0/Qubes Manager may complain that the AppVM failed to boot.
That’s a false alarm (you can increase AppVM’s default boot timeout using
qvm-prefs), the VM should appear “green” in Qubes Manager shortly after.
For Windows 10, the user directories have to be moved manually, because the automatic transfer during QWT installation is bound to crash due to undocumented new features of NTFS, and a system having the directory userson another disk than C: will break on Windows update. So the following steps should be taken:
-
The Windows disk manager may be used to add the private volume as disk
D:, and you may, using the documented Windows operations, move the user directoriesC:\users\<username>\Documentsto this new disk, allowing depending AppVMs to have their own private volumes. Moving the hidden application directoriesAppData, however, is likely to invite trouble - the same trouble that occurs if, during QWT installation, the optionMove user profilesis selected. -
Configuration data like those stored in directories like
AppDatastill remain in the TemplateVM, such that their changes are lost each time the AppVM shuts down. In order to make permanent changes to these configuration data, they have to be changed in the TemplateVM, meaning that applications have to be started there, which violates and perhaps even endangers the security of the TemplateVM. Such changes should be done only if absolutely necessary and with great care. It is a good idea to test them first in a cloned TemplateVM before applying them in the production VM.
It also makes sense to disable Automatic Updates for all the template-based AppVMs – of course this should be done in the Template VM, not in individual AppVMs, because the system-wide settings are stored in the root filesystem (which holds the system-wide registry hives). Then, periodically check for updates in the Template VM and the changes will be carried over to any child AppVMs.
Once the template has been created and installed it is easy to create AppVMs based on it:
qvm-create --property virt_mode=hvm <new windows appvm name> --template <name of template vm> --label <label color>
Components
Qubes Windows Tools (QWT for short) contain several components than can be enabled or disabled during installation:
- Shared components (required): common libraries used by QWT components.
- Xen PV drivers: drivers for the virtual hardware exposed by Xen.
- Base Xen PV Drivers (required): paravirtual bus and interface drivers.
- Xen PV Disk Drivers: paravirtual storage drivers.
- Xen PV Network Drivers: paravirtual network drivers.
- Qubes Core Agent: qrexec agent and services. Needed for proper integration with Qubes.
- Move user profiles: user profile directory (
c:\users) is moved to VM’s private disk backed by private.img file in dom0 (useful mainly for HVM templates).
- Move user profiles: user profile directory (
- Qubes GUI Agent: video driver and gui agent that enable seamless showing of Windows applications on the secure Qubes desktop.
- Disable UAC: User Account Control may interfere with QWT and doesn’t really provide any additional benefits in Qubes environment.
In testing VMs only it’s probably a good idea to install a VNC server before installing QWT. If something goes very wrong with the Qubes gui agent, a VNC server should still allow access to the OS.
NOTE: Xen PV disk drivers are not installed by default. This is because they seem to cause problems (BSOD = Blue Screen Of Death). We’re working with upstream devs to fix this. However, the BSOD seems to only occur after the first boot and everything works fine after that. Enable the drivers at your own risk of course, but we welcome reports of success/failure in any case (backup your VM first!). With disk PV drivers absent qvm-block will not work for the VM, but you can still use standard Qubes inter-VM file copying mechanisms.
Xen PV driver components may display a message box asking for reboot during installation – it’s safe to ignore them and defer the reboot.
Installation logs
If the install process fails or something goes wrong during it, include the installation logs in your bug report. They are created in the %TEMP% directory, by default <user profile>\AppData\Local\Temp. There are two text files, one small and one big, with names starting with Qubes_Windows_Tools.
Uninstalling QWT is supported from version 3.2.1. Uninstalling previous versions is not recommended. After uninstalling you need to manually enable the DHCP Client Windows service, or set IP settings yourself to restore network access.
Configuration
Starting from version 2.2.* various aspects of Qubes Windows Tools can be configured through registry. Main configuration key is located in HKEY_LOCAL_MACHINE\SOFTWARE\Invisible Things Lab\Qubes Tools. Configuration values set on this level are global to all QWT components. It’s possible to override global values with component-specific keys, this is useful mainly for setting log verbosity for troubleshooting. Possible configuration values are:
| Name | Type | Description | Default value |
|---|---|---|---|
| LogDir | String | Directory where logs are created | c:\Program Files\Invisible Things Lab\Qubes Tools\log |
| LogLevel | DWORD | Log verbosity (see below) | 2 (INFO) |
| LogRetention | DWORD | Maximum age of log files (in seconds), older logs are automatically deleted | 604800 (7 days) |
Possible log levels:
| Level | Type | Description |
|---|---|---|
| 1 | Error | Serious errors that most likely cause irrecoverable failures |
| 2 | Warning | Unexpected but non-fatal events |
| 3 | Info | Useful information (default) |
| 4 | Debug | Internal state dumps for troubleshooting |
| 5 | Verbose | Trace most function calls |
Debug and Verbose levels can generate large volume of logs and are intended for development/troubleshooting only.
To override global settings for a specific component, create a new key under the root key mentioned above and name it as the executable name, without .exe extension. For example, to change qrexec-agent’s log level to Debug, set it like this:

Component-specific settings currently available:
| Component | Setting | Type | Description | Default value |
|---|---|---|---|---|
| qga | DisableCursor | DWORD | Disable cursor in the VM. Useful for integration with Qubes desktop so you don’t see two cursors. Can be disabled if you plan to use the VM through a remote desktop connection of some sort. Needs gui agent restart to apply change (locking OS/logoff should be enough since qga is restarted on desktop change). | 1 |
Troubleshooting
If the VM is inaccessible (doesn’t respond to qrexec commands, gui is not functioning), try to boot it in safe mode:
qvm-start --debug vmname- mash F8 on the boot screen to enable boot options and select Safe Mode (optionally with networking)
Safe Mode should at least give you access to logs (see above).
Please include appropriate logs when reporting bugs/problems. Starting from version 2.4.2 logs contain QWT version, but if you’re using an earlier version be sure to mention which one. If the OS crashes (BSOD) please include the BSOD code and parameters in your bug report. The BSOD screen should be visible if you run the VM in debug mode (qvm-start --debug vmname). If it’s not visible or the VM reboots automatically, try to start Windows in safe mode (see above) and 1) disable automatic restart on BSOD (Control Panel - System - Advanced system settings - Advanced - Startup and recovery), 2) check the system event log for BSOD events. If you can, send the memory.dmp dump file from c:\Windows.
Xen logs (/var/log/xen/console/guest-*) are also useful as they contain pvdrivers diagnostic output.
If a specific component is malfunctioning, you can increase its log verbosity as explained above to get more troubleshooting information. Below is a list of components:
| qrexec-agent | Responsible for most communication with Qubes (dom0 and other domains), secure clipboard, file copying, qrexec services. |
| qrexec-wrapper | Helper executable that’s responsible for launching qrexec services, handling their I/O and vchan communication. |
| qrexec-client-vm | Used for communications by the qrexec protocol. |
| qga | Gui agent. |
| QgaWatchdog | Service that monitors session/desktop changes (logon/logoff/locking/UAC…) and simulates SAS sequence (ctrl-alt-del). |
| qubesdb-daemon | Service for accessing Qubes configuration database. |
| network-setup | Service that sets up network parameters according to VM’s configuration. |
| prepare-volume | Utility that initializes and formats the disk backed by private.img file. It’s registered to run on next system boot during QWT setup, if that feature is selected (it can’t run during the setup because Xen block device drivers are not yet active). It in turn registers move-profiles (see below) to run at early boot. |
| relocate-dir | Utility that moves user profiles directory to the private disk. It’s registered as an early boot native executable (similar to chkdsk) so it can run before any profile files are opened by some other process. Its log is in a fixed location: c:\move-profiles.log (it can’t use our common logger library so none of the log settings apply). |
Updates
When we publish new QWT version, it’s usually pushed to the current-testing or unstable repository first. To use versions from current-testing, run this in dom0:
qubes-dom0-update --enablerepo=qubes-dom0-current-testing qubes-windows-tools
That command will download a new QWT .iso from the testing repository. It goes without saying that you should backup your VMs before installing anything from testing repos.